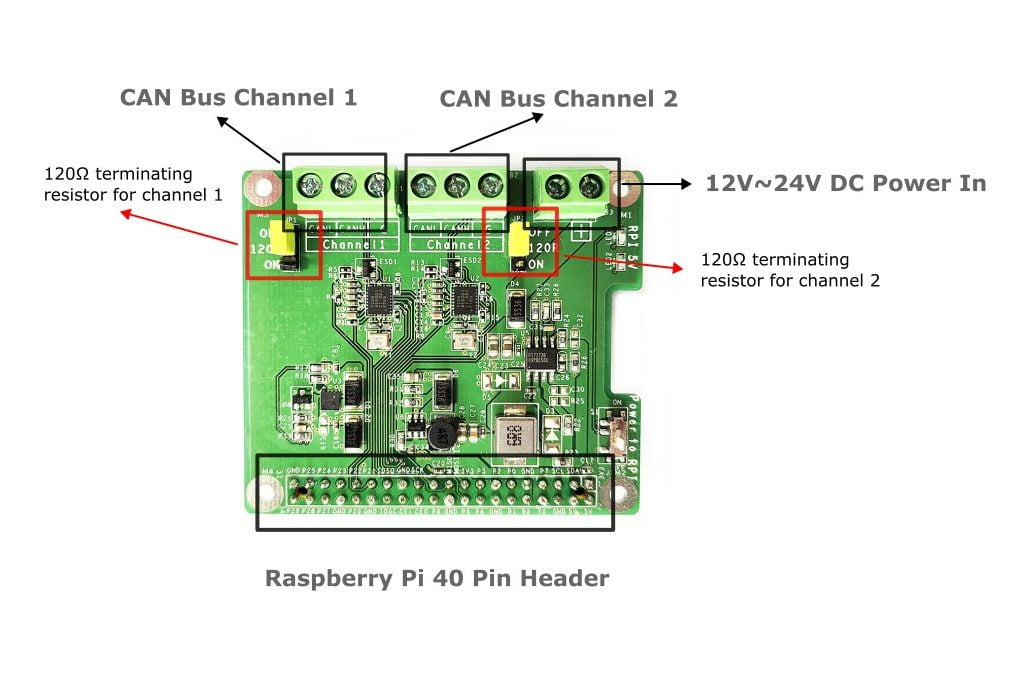
Hardware Overview
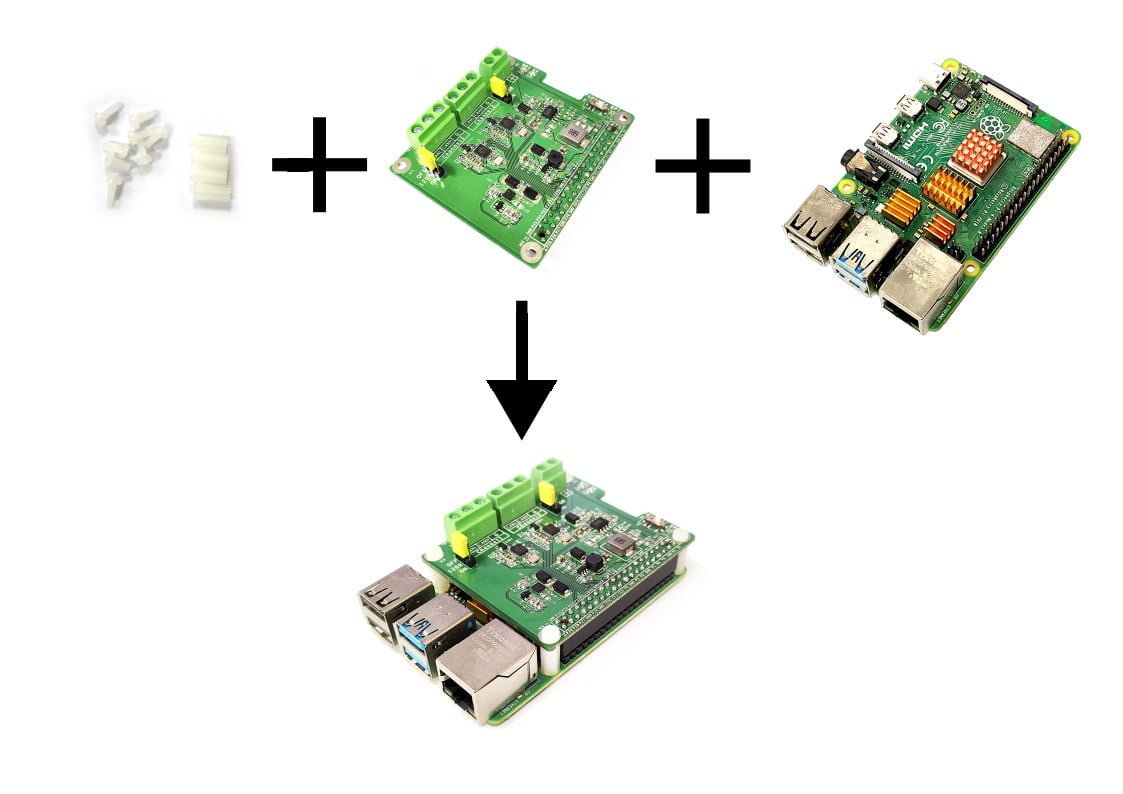
Mounting Guide
Software
Install Pi-2CAN FD
Step 1. Download the Pi-2CAN FD software package.
Step 2. Open terminal and run commands below to install
tar zxvf Pi-2CAN_FD.tar.gz sudo makesudo make installcd ../..dtc -@ -I dts -O dtb -o tcan4X5X.dtbo tcan4550.dts sudo cp tcan4X5X.dtbo /boot/overlays/ |
Step 3. Open config.txt file
sudo nano /boot/config.txt |
Step 4. Add the following line at the end of the file
dtoverlay=tcan4X5X |
Step 3. Press Ctrl + x, press y and press Enter to save the file
Step 4. Reboot Raspberry Pi
sudo reboot |
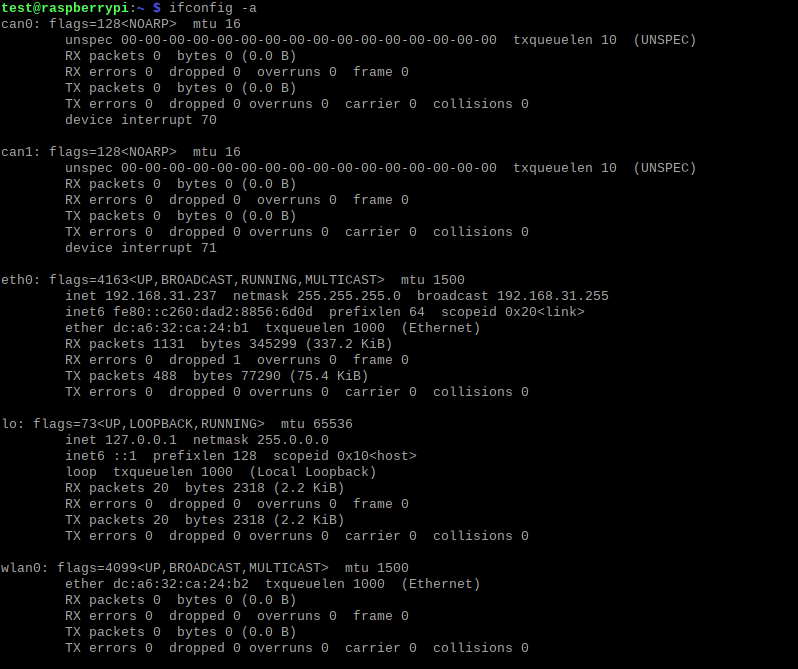
Step 5. Check the kernel log to see if Pi-2CAN FD was initialized successfully. You will also see can0 and can1 appear in the list of ifconfig results
dmesg | grep spi |

ifconfig -a |
Step 6. Set the can fd protocol, and the dbitrate can be set to 8M speed.
sudo ip link set can0 up type can bitrate 1000000 dbitrate 8000000 restart-ms 1000 berr-reporting on fd onsudo ip link set can1 up type can bitrate 1000000 dbitrate 8000000 restart-ms 1000 berr-reporting on fd on sudo ifconfig can0 txqueuelen 65536sudo ifconfig can1 txqueuelen 65536 |
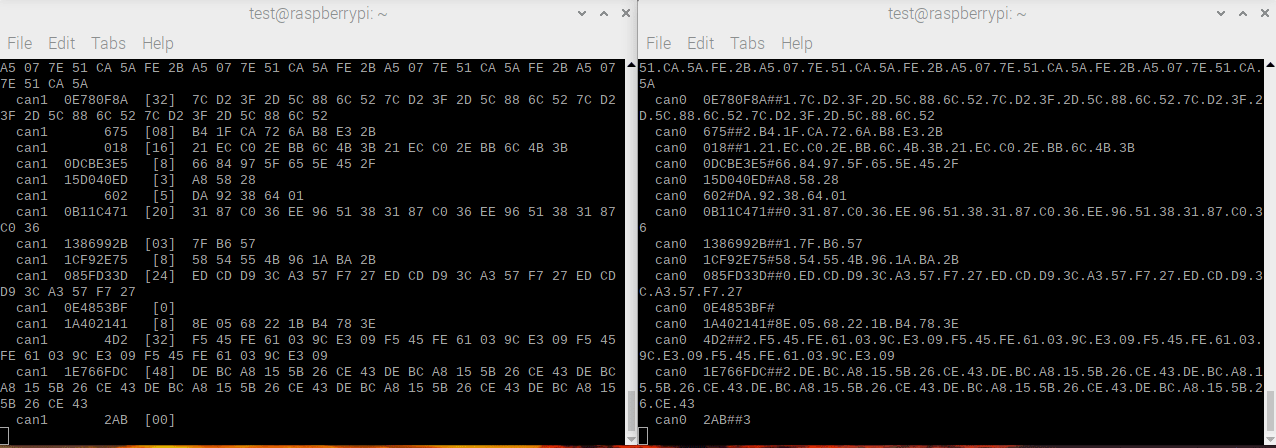
Step 7. Test the CAN-BUS by connecting two channels by itself :
Channel0 CANL <===> Channel1 CANL , Channel0 CANH <===> Channel1 CANH .
Open two terminal windows and enter the following commands in the Windows to test can fd protocol.
sudo apt-get install can-utils#send datacangen can0 -mv #dump datacandump can1 |